
Step-by-Step Planting Guide: Create a Stunning Sempervivum Centerpiece
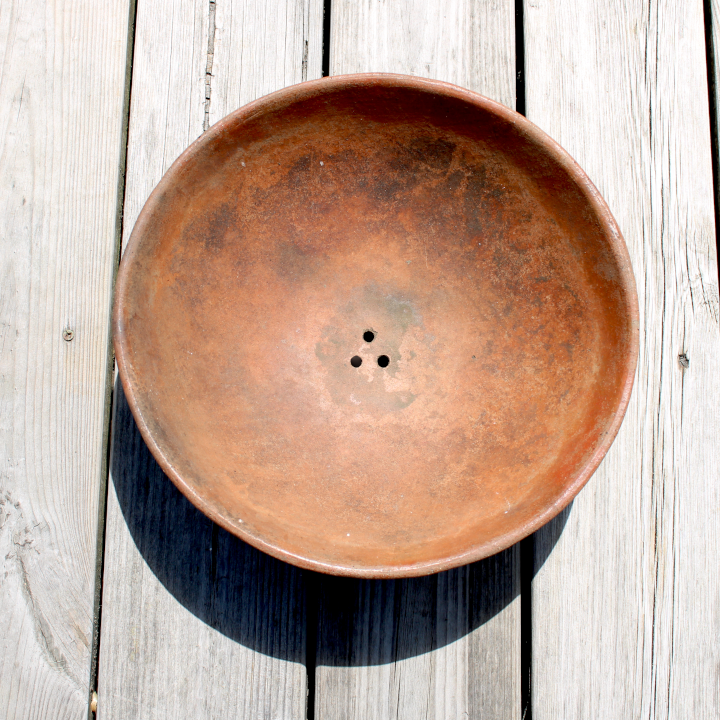
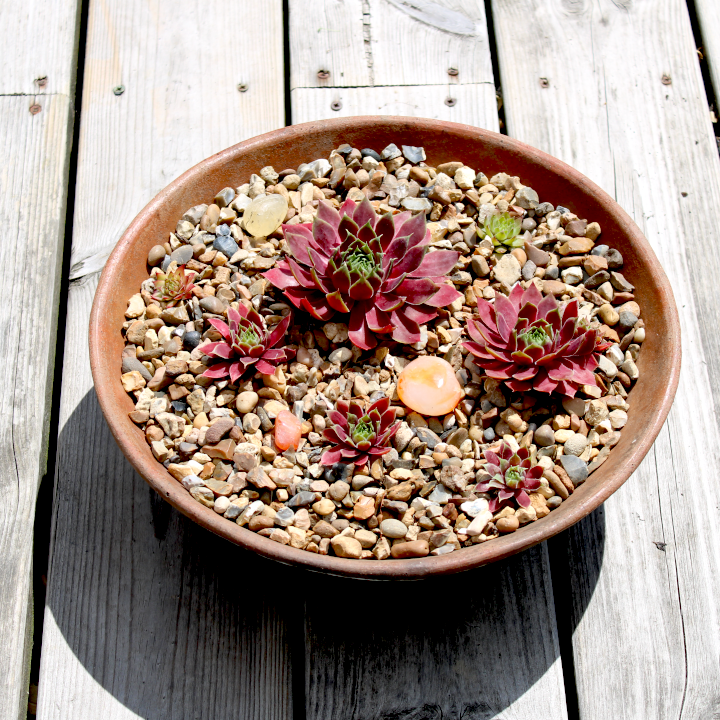
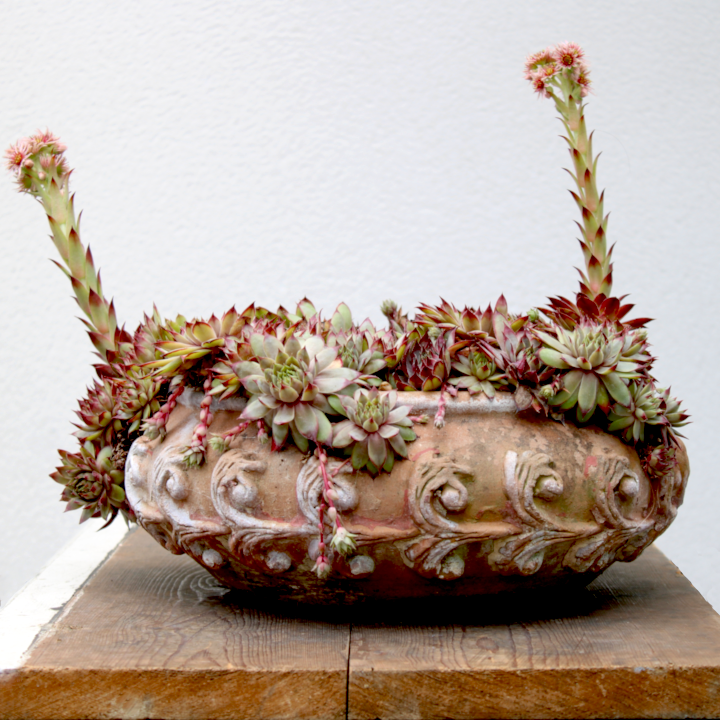
Are you in search of a garden feature that blends stunning beauty with minimal effort? Look no further than Sempervivums, lovingly called 'Hens and Chicks' or Houseleeks. These resilient and versatile succulents, with their distinctive rosette shapes and rich textures, are an absolute dream for creating stunning, low-maintenance container arrangements. They effortlessly elevate the aesthetic of any garden or patio. In this step-by-step guide, I'll show you how to plant your very own gorgeous Sempervivum centrepiece bowl that will thrive and delight. The right home is crucial for your Sempervivum centrepiece. Choose a wide, shallow bowl—this shape beautifully showcases the rosettes and allows for plenty of arrangement space. Excellent drainage is paramount for Sempervivums, as they absolutely do not tolerate soggy roots. Materials like terracotta, natural stone, or unglazed ceramic are ideal, as they promote breathability and offer a rustic, natural aesthetic that perfectly complements the plants. If your chosen container lacks drainage holes, now is the time to carefully drill several 8 mm holes using a masonry bit. Creative Tip: Give your centerpiece a unique character by upcycling vintage bowls from charity shops! Now it's time to create the perfect foundation for your Sempervivums. It's time to bring your centrepiece to life! With your Sempervivums neatly planted, it's time for the finishing touch! Your stunning Sempervivum centrepiece is complete! Now, to ensure it thrives and displays its most vibrant colours, placement is key. Find a spot that receives full sun outdoors—this means at least 6 hours of direct sunlight per day. Sempervivums absolutely adore bright light; the more sun they get, the more intensely their unique hues and markings will develop. Place it on a patio table, a garden wall, or anywhere it can bask in the sunshine and be admired! Just imagine your newly planted centrepiece two years from now! The photo below captures a Sempervivum centrepiece that was planted just a couple of years ago—and what a transformation it’s undergone. This stunning display is a testament to how much these amazing succulents can grow, multiply, and flourish with time. When first planted, your Sempervivum centrepiece might look a bit sparse, with just a few "hens" and their tiny "chicks" nestled into the soil. But fast forward two seasons, and those chicks will have spread, filled in every gap, and begun to spill gracefully over the container’s edges. What started as a minimalist arrangement will become a lush, overflowing tapestry of texture and colour—an eye-catching centrepiece you’ll be proud of. As your Sempervivum bowl matures, take a closer look and you might even notice something extra special: tall stalks rising above the rosettes. These are flower stalks! While Sempervivums are monocarpic—meaning the main “hen” that flowers will eventually die—it will have already produced a whole new generation of chicks to carry on the show. It’s nature’s way of ensuring the cycle continues, and it adds another layer of seasonal interest to your planting. Best of all? Despite their dramatic transformation, Sempervivums remain one of the easiest plants to care for. They thrive on neglect, requiring minimal water, no fuss, and very little maintenance. It’s the kind of effortless beauty that every gardener dreams of. So if you’re just starting your Sempervivum container, don’t be discouraged by its early days. With a little time and patience, you’ll be rewarded with a living sculpture that evolves and improves year after year. This long-term beauty is just one more reason why Sempervivums are such a rewarding choice for container gardening! To ensure your stunning sempervivum centrepiece thrives for years, here's everything you need to know about their simple care requirements. The golden rule? Water infrequently. Sempervivums need at least 6 hours of direct sun daily to maintain their compact shape and rich colours. These little succulents are cold-hardy champs! Most Sempervivums can survive snow and freezing temperatures with no problem. Sempervivums are not heavy feeders. In fact, they often don’t need fertilising at all—especially in rich or fresh soil. These hardy plants are generally resistant to pests and disease. That said, it’s good to stay aware of: To keep your Sempervivum centrepiece looking fresh & stylish: Let Them Thrive with Less With just a few easy habits—sun, sparing water, and occasional tidying—your Sempervivum centrepiece can become a long-lasting, ever-evolving work of living art. Whether you're a seasoned succulent collector or a gardening beginner, hens and chicks are a low-maintenance delight with a high visual payoff. Here's to many years of growing, multiplying, and thriving together!Gather Your Supplies
Step-by-Step Guide
Select Your Perfect Container
Prepare the Drainage and Potting Mix
Plant Your Sempervivum Collection
Finish with a Decorative Gravel Top Dressing
Choose the Ideal Sunny Location
Sempervivum Transformation: From Chicks to Flourishing Hens
Caring for Your Sempervivum Centrepiece: Keeping Your Hens & Chicks Happy
Watering: Not Frequent
Light: Sun Lovers
Temperature: Surprisingly Tough
Fertilising: Less Is More
Pests & Problems: Mostly Trouble-Free
Grooming & Maintenance: A Little Goes a Long Way